An Artist's Guide to C# in Unity3D: Creating your first script
This article is part of an ongoing series for code-leaning artists who want to learn Unity 3D. In this article I show you how to create your first script in Unity.
This article is part of an ongoing series for code-leaning artists who want to learn Unity 3D. In this article I show you how to create your first script in Unity.
Read previous: Setting up your learning environment
Unity Editor Overview
If this is your first time using Unity or any integrated development environment (IDE), the Unity Editor interface can appear quite daunting.
So, I’ll just start by saying, “fear not!”
You’ll grow comfortable with the unity interface very quickly. Additionally, since we’ll be focusing more on learning C#, we will limit our concerns to just a handful of Unity’s features to begin with. This will give you ample time to learn how Unity works before exploring on your own.
For now, go ahead and launch the project you created in the previous lesson.
Lets identify the different panels we’ll be interacting with.
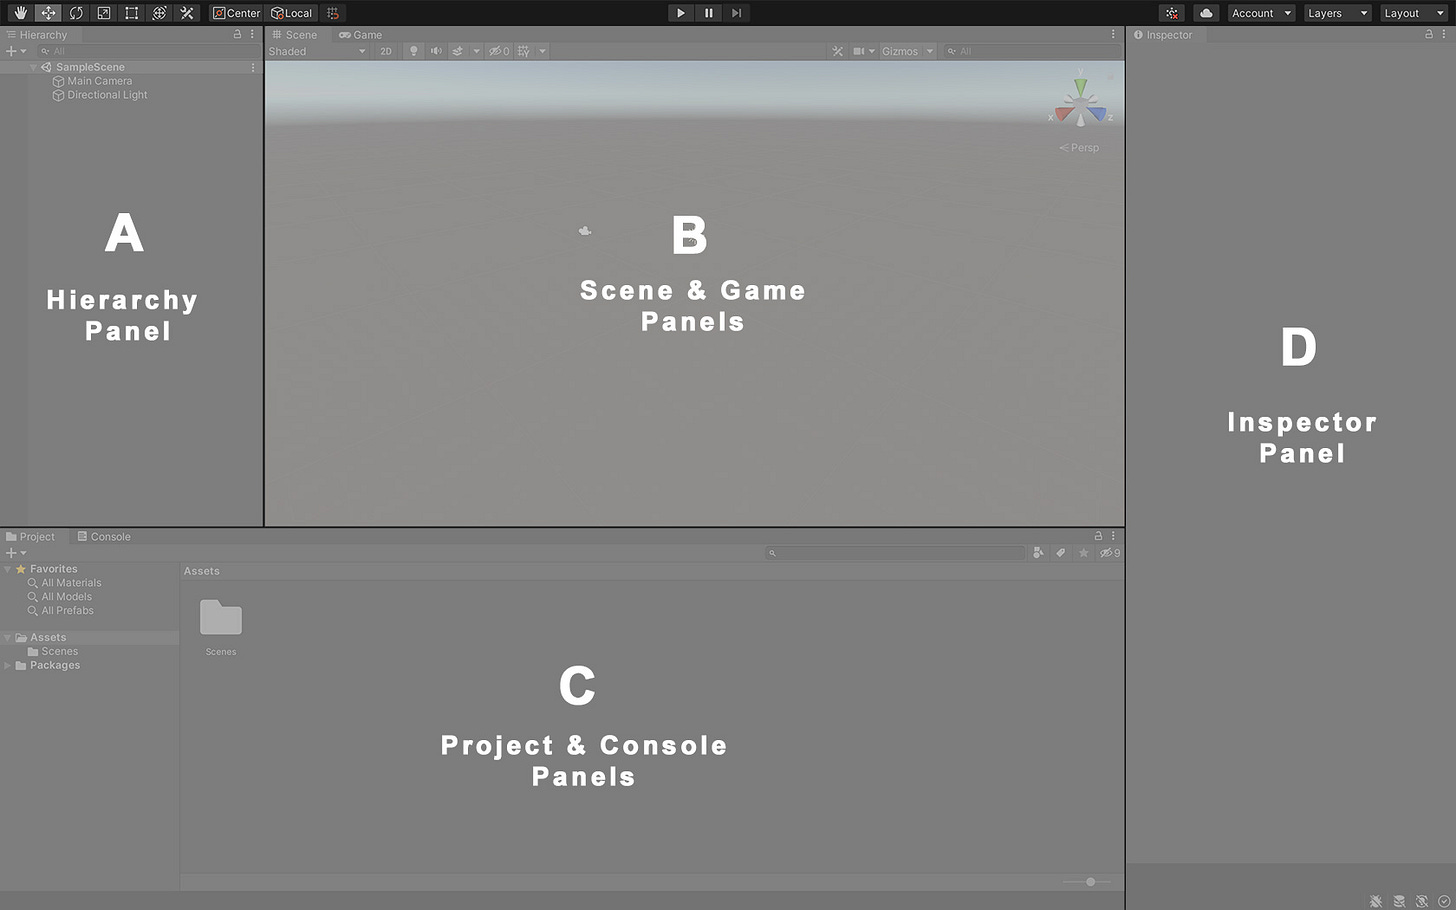
The Unity Editor’s default layout has four main panel group regions.
Hierarchy (A) panel -- lists every item in your game scene, in hierarchical order. It is useful for organizing your scene items, grouping items, nesting items and providing for easy selection of items especially within large scenes.
Scene and Game panels (B) -- these two panels are grouped together. The scene panel allows you to visually add and arrange your game objects like a director placing props and actors on a stage. The game view panel only becomes active when you hit the play button to enter play mode. In this mode, the Unity Editor compiles all your game objects along with accompanying logic found in your C-sharp scripts and runs your game the way it would execute on a target device.
Project and Console panels (C) -- these are the two panels grouped underneath the hierarchy and scene/game panel group. The project panel holds all your project’s folders and file assets. Things like your game graphics, sprites and script files would be contained here. It's really just Unity’s representation of the actual Assets folder that exists on your hard disk. The console panel is where we will spend a lot of our time as we learn C-sharp. When we instruct our code to print a line of text, that output is displayed in the console panel. Unity also displays all notifications and error messages that occur while running our game in this panel.
Inspector panel (D) -- this panel is context-sensitive. Anytime you select an item from the scene panel, the hierarchy panel or the project panel, the item’s attributes and properties are displayed in this panel. The values of these properties can be modified through the inspector.
Create Your First Script
Lets jump right in and start learning what we came here to do. Right now your unity editor is displaying a sample game scene. This works just fine for our C-sharp learning goals. So lets start exploring a bit.
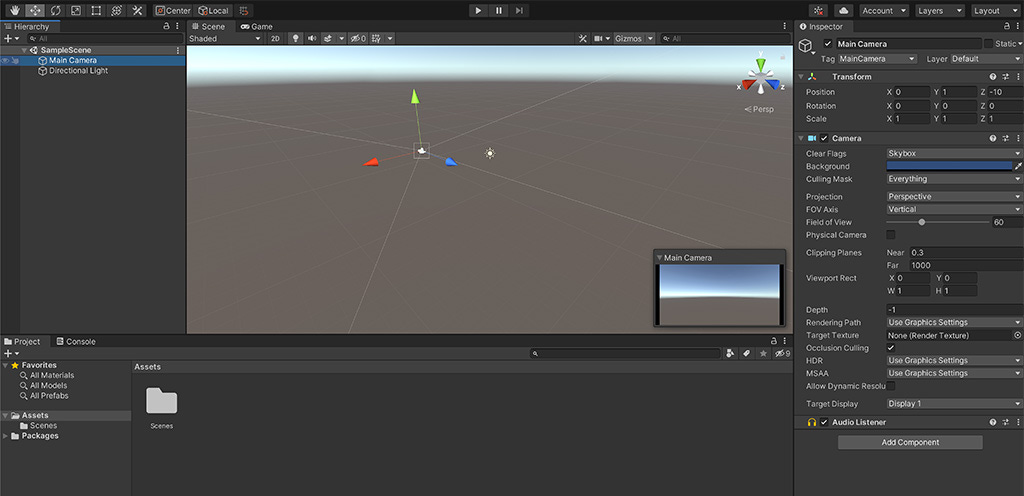
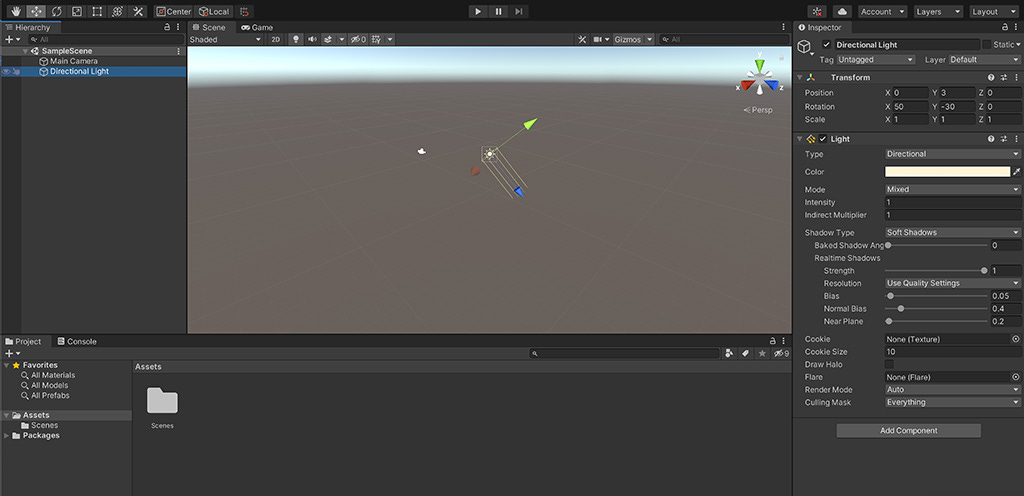
In the Hierarchy panel, you’ll see our SampleScene and two default objects underneath it--Main Camera and Directional Light. These are default game objects that Unity automatically creates for you when you start a new project.
Try clicking on the Main Camera. You’ll notice that the camera graphic gets selected in the scene panel and the inspector panel also displays lots of information about the Main Camera. Just take a look at the attributes for now. No need to change them if you don’t want to. Click on the Directional Light to see its attributes.
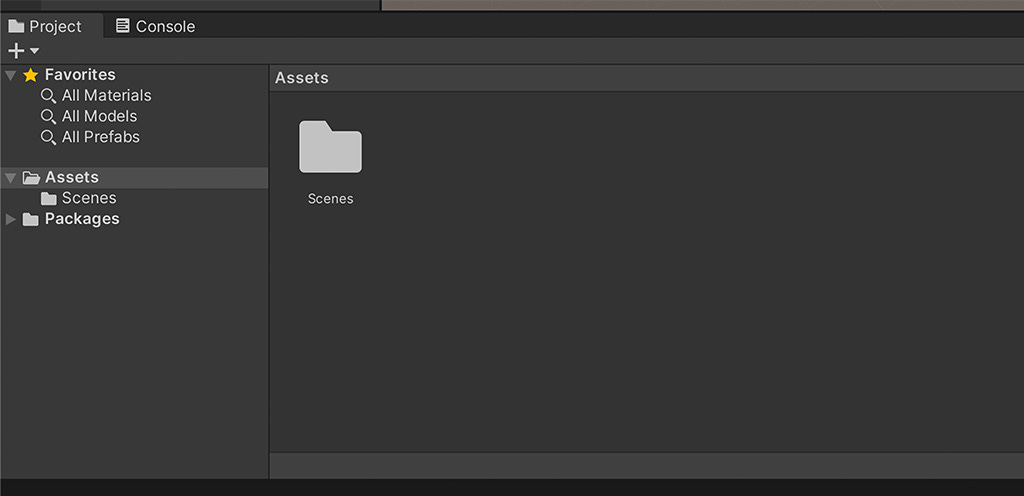
Let's move our attention down to the Project & Console panel group. You’ll notice that the project panel is divided into two sections. There’s a folder view display on the left side and a larger content window on the right. This works just like the file finder or file explorer you use on your computer to locate files. The content view on the right will always display the contents of whatever is selected from the folder view on the left.
Click on the Assets folder in the folder list on the left side. There is currently one nested folder inside this folder called Scenes. If you click on the Scenes folder (either from the left folder list or by double-clicking on the scenes folder icon on the right) you’ll see that it contains one item called “SampleScene.” This is the game scene currently displayed in the Scene and Hierarchy panels--also known as the active scene.
Click back on the Assets folder to select it and view its contents. The scenes folder looks pretty lonely, so let's give it some company by creating a second folder inside our assets folder.
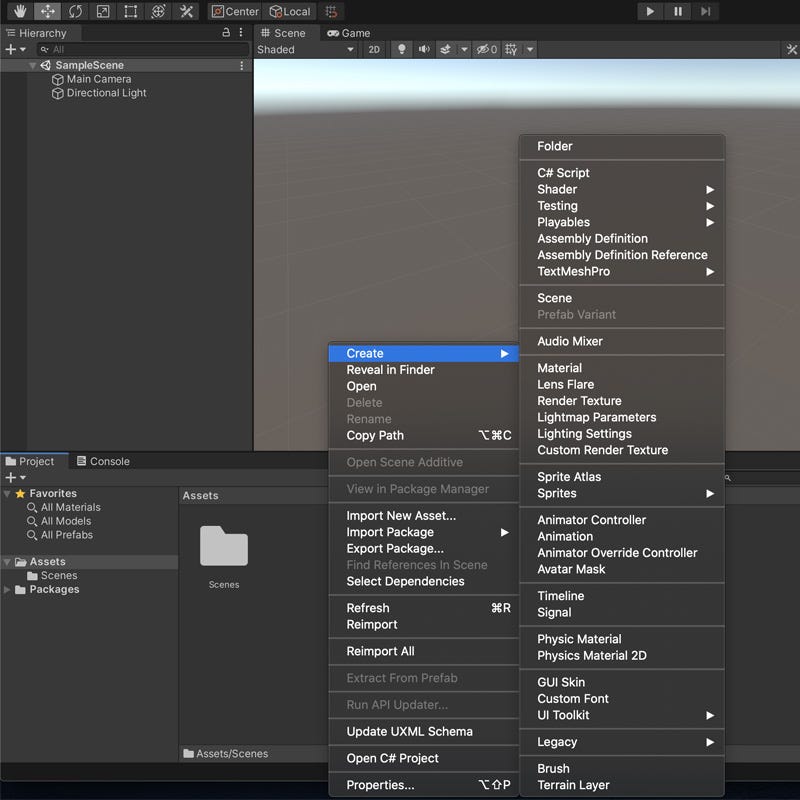
In the content window, right-click on the blank space next to the scenes folder to bring up an action menu. Select:
Create > Folder
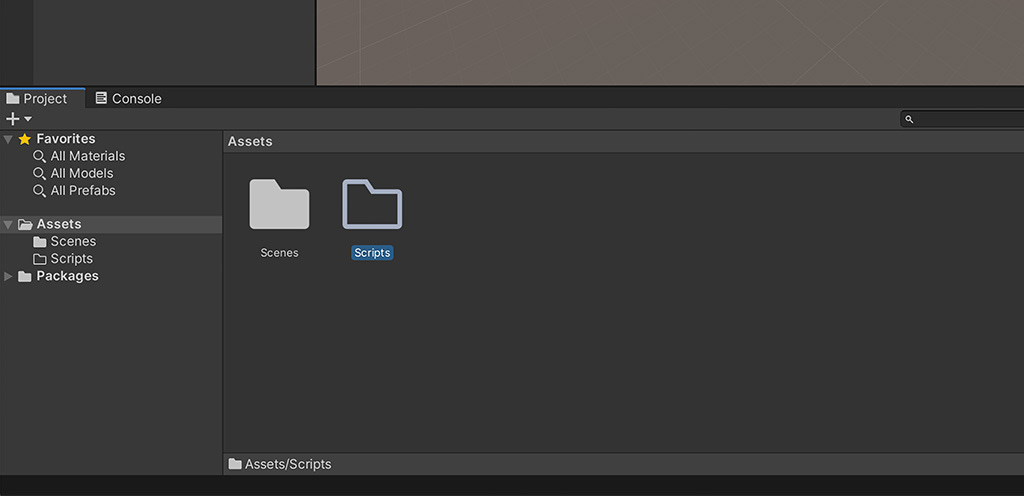
A new folder will appear. Rename this folder to Scripts.
The scripts folder is currently empty. Let's create our first script inside it. Select the scripts folder. The content view says “This folder is empty.”
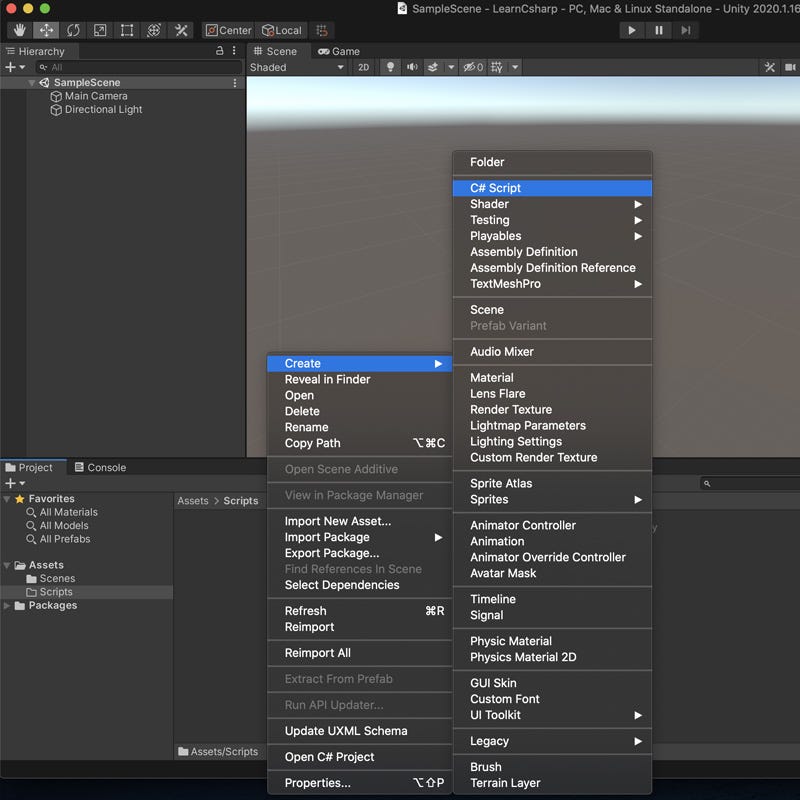
Right-click on the empty space again to pull up the action menu and select:
Create > C# Script
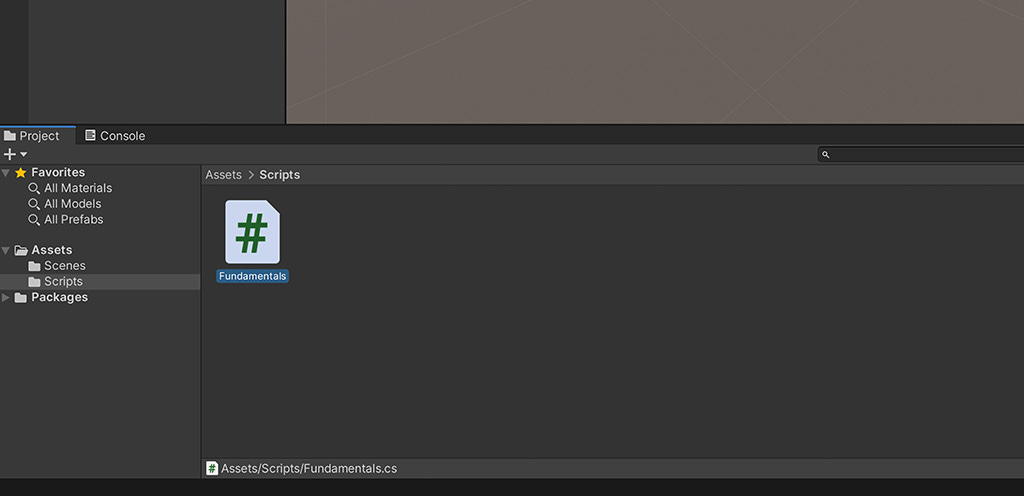
Rename the new script to Fundamentals. It's important to match the letter casing exactly otherwise we may run into errors in the future.
Now, guess what? Technically, you’ve just created your first C# script in Unity!
It's still not doing anything yet so lets fix that next.
Make Your Script Do Something
We have created our first script in our project but it doesn’t “do” anything yet. In order to change that we need to edit our script. This is simple enough to accomplish.
From the content view of your project panel, double click the script you just created. This will launch another program, Visual Studio, which comes bundled with your Unity installation. Visual Studio is Unity’s default program for editing C-sharp code.
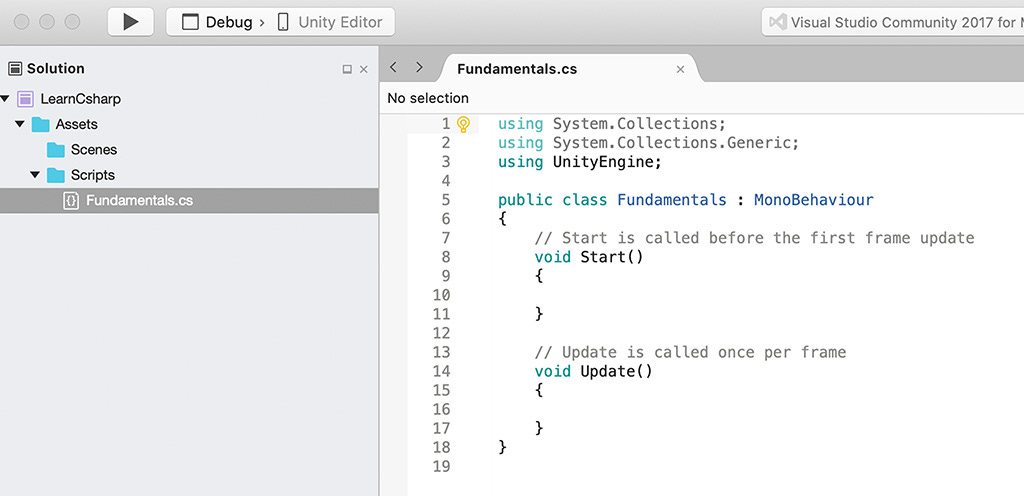
Once it launches it will display the current contents of your script Fundamentals.cs.
We’ll discuss what all that code means in a minute. Right now we’ll just add a line to print a simple message to the console panel.
Find the section where it says,
void Start()
{
}
And change it to the following:
void Start()
{
    Debug.Log(“Unity Rocks!”);
}
All we’ve done is add a single line between some curly braces:
Debug.Log(“Unity Rocks!”);
This is how we instruct Unity to “print” or “log” some text to the console screen.
Save the script file and go back to the Unity Editor.
Click on the console panel tab so we can see its contents. It's currently empty but if all goes according to plan, once we run our program, we should see the words “Unity Rocks!” printed in the console.
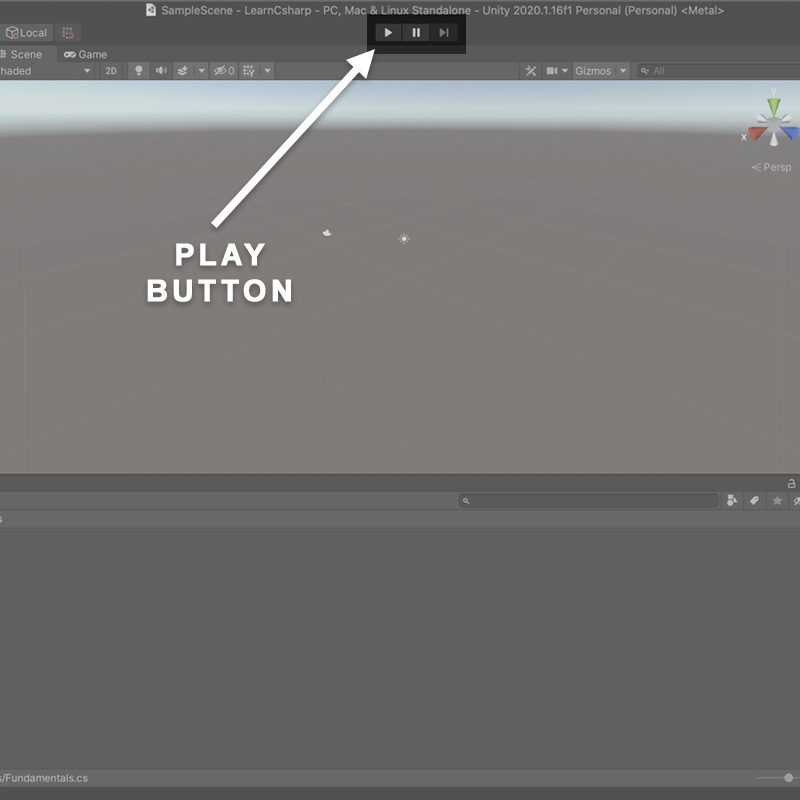
Located at the top middle portion of the Unity Editor, you’ll see the play and pause buttons. This is how we run our programs in Unity.
Click the play button.
Unity runs our program and… nothing happens!
Click the play button again to stop it.
So what happened?
Well, I forgot to tell you that all C-sharp scripts in Unity need to be attached to game objects in the scene. This is done by adding our scripts as “components” to any number of desired game objects. When the game runs, all attached component scripts are executed on that object. This is how we add behaviors, actions and custom functionality to objects in our game.
Our scene contains two objects at the moment--the main camera and a directional light. Although we could add our script to these objects, it’s just as easy to add it to our own special object. Let's do that now.
In the hierarchy panel, click the plus button found in the top left corner of the view to display an actions menu. Select:
3D Object > Cube
This creates a cube in the center of our scene view and adds it to the hierarchy view. We’re going to attach our Fundamentals.cs script to this cube.
Attaching a script to an object is as simple as dragging the script from the project panel and dropping it unto the desired object in the scene view. Go ahead and try that. Make sure your project panel view is visible and you can see the Fundamentals.cs script in the context window. Click and drag the script file and drop it unto the cube object in the scene view.
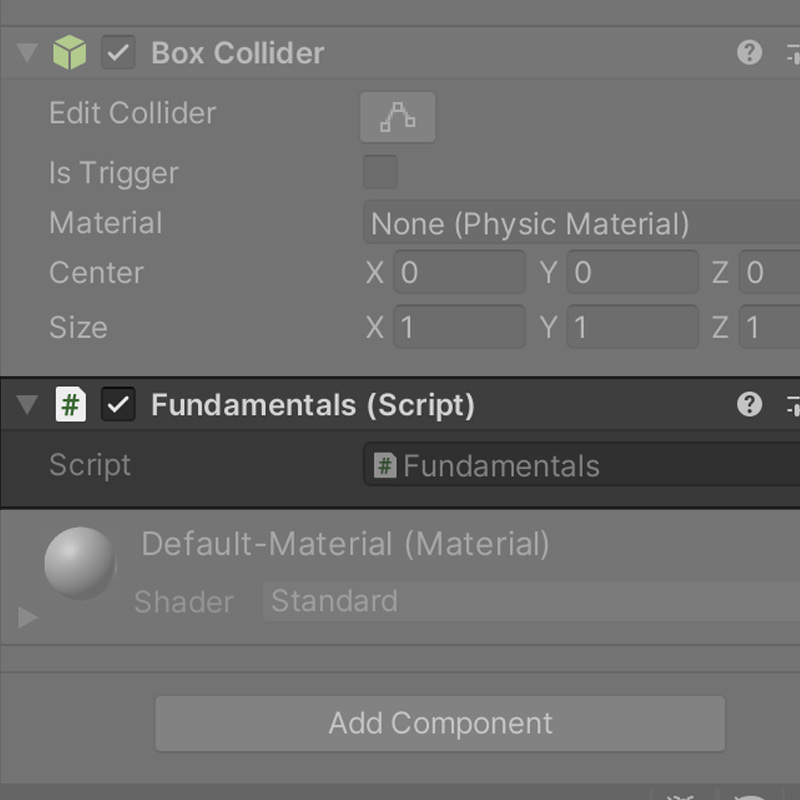
Now, if you select the cube in the scene, you should now see theFundamentals (Script) listed as one of the cube’s components in the inspector panel. You may need to scroll the inspector window down to see it.
Now we’re ready to test.
Click on the console panel again so it's visible. Then click the play button like you did before.
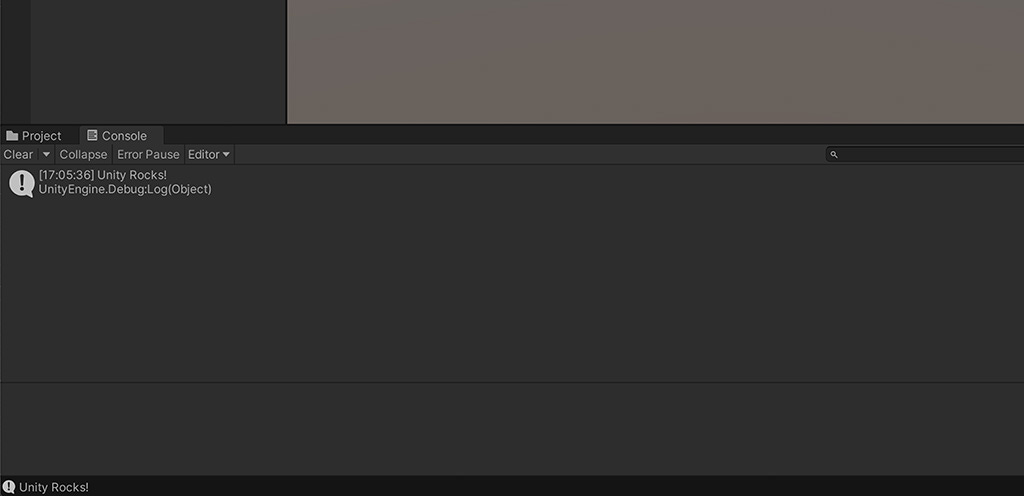
Viola! The expected output is printed in the console window preceded by a timestamp.
Something like this:
Unity Rocks!
UnityEngine.Debug:Log(Object)
Congratulations, for real this time!
You have created your first functioning C# script in Unity.
We now have a good base script that we can keep adding to throughout the rest of this series.
Before we end this lesson, let's go back to Visual Studio and take a look at what we have.
Basic Parts of a Unity Script
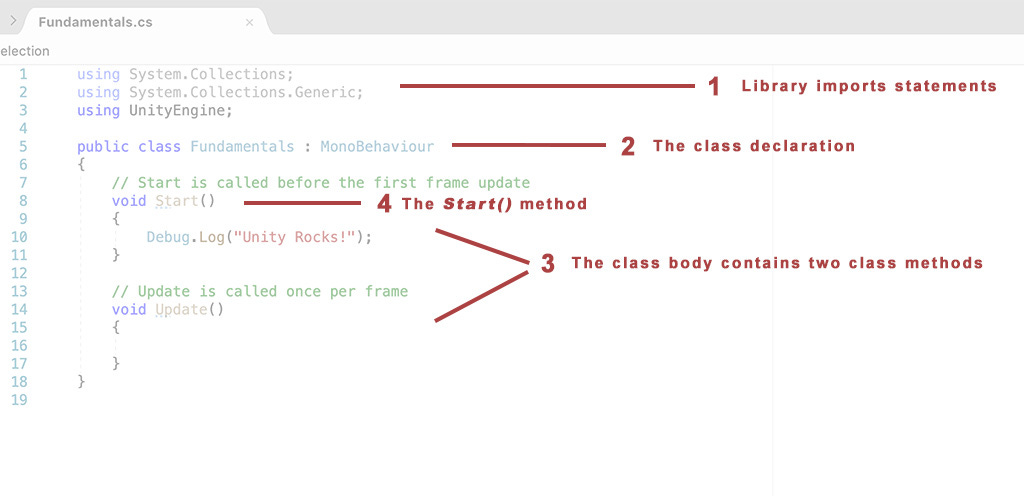
Here is what our Fundamentals.cs script looks like so far.
using System.Collections;
using System.Collections.Generic;
using UnityEngine;
public class Fundamentals : MonoBehaviour
{
    // Start is called before the first frame update
    void Start()
    {
        Debug.Log("Unity Rocks!");
    }
    // Update is called once per frame
    void Update()
    {
}
}
For our purposes, I’ll quickly identify the basic parts of the script and draw your attention to the portions you’ll need to know as we practice and build on your C# scripting skills. At this point you’re only required to know where to add your code in the script file. More advanced aspects of the file will be explained as your C# knowledge grows.
Library import statements
Class declaration and body
The Class’ methods
The Start method
I’m identifying these parts just to make you aware of them. However, we only need to pay special attention to section 2 and 4 for now.
Regarding section #2, think of the Class declaration and its body (all the code between first and last curly braces) as the encapsulation body (or shell) of this particular C# script. The restriction to remember here is that the name “Fundamentals,” must match the name of the script file--Fundamentals.cs.
The class can contain any number of named coding blocks, called methods in this context. These code blocks are also demarcated with their own set of curly braces. We have two methods in the Fundamentals class:
void Start()
{
    …
}
And …
void Update()
{
    …
}
We’ll ignore the Update method for now and focus on the Start method.
The Start method is a special method that gets executed when our game scene is loaded exactly once. When you hit the play button in Unity, the engine loaded the scene and all its containing game objects. For each game object, Unity located the object’s Start function and executed it once. That’s why we added our code to this code block.
We will be adding most of our code to this block as we learn the basic features of C-sharp throughout this course.
Lastly, I’d like to mention the lines that begin with //. These are comment lines for the benefit of the programmer and are always ignored by the game engine.
Next, we’ll cover variables and common data types in C-sharp.
An Artist's Guide to C# in Unity3D


