An Artist's Guide to C# in Unity3D: Classes
This article is an addition to my series for code-leaning artists who want to learn Unity 3D. In this article we learn about classes.
This article is an addition to my series for code-leaning artists who want to learn Unity 3D. In this article we learn about functions and methods.
The series is available here.
Way back in lesson three of the Artist’s Guide to C# in Unity, we learned about common data types. These built-in data types are great for representing simple data values.
Need to track a player’s game score? No problem--use an integer
Need to set the speed of a ball? Check--use a float
Need to indicate if a character is alive or dead? Easy--use a boolean
Need to store a character’s first name? (Is this supposed to be hard?) Use a string
And on and on.
These work fine for many simple cases, but what if you need to represent something a little more complex or multidimensional like a box, or a dog or a whole character. Can we do this in C-sharp?
The answer is, “of course, we can!”
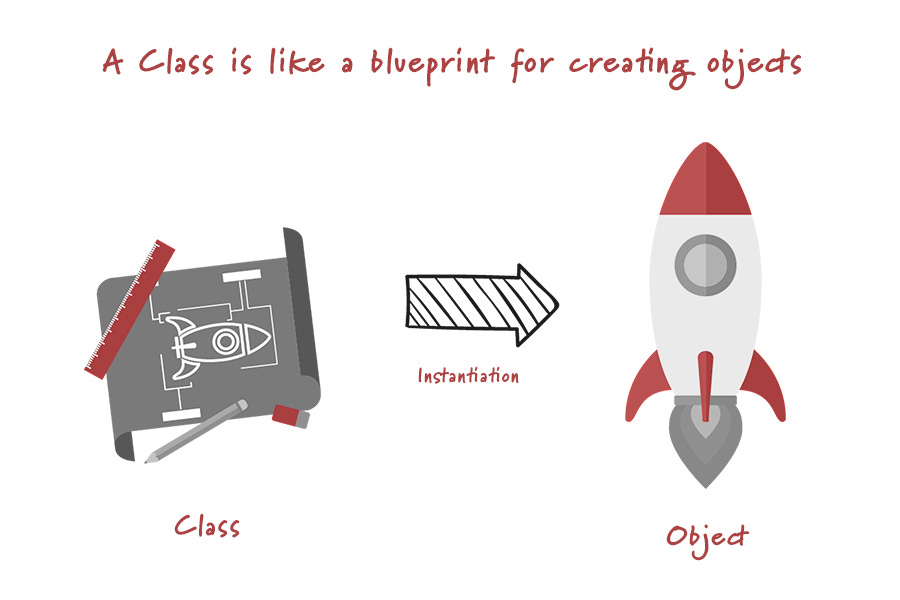
You can define your own “custom data type” and then create objects of this data type whenever you want. You define custom data types using something called a class--it's sort of like a blueprint. This blueprint is then used to create one or more instances of your custom data type--these are the objects you assign to a variable and use in your program.
So, to restate, a class is like a set of blueprints, and instances are the actual objects created from the blueprints. Each “blueprint” contains any number of internal attributes (variables) and behaviors (functions/methods) that make-up the object.
Parts of a class
A basic class definition adheres to the following format:
access_level class class_name {

   // attributes -- variables

   access_level data_type variable1;
   access_level data_type variable2;
   access_level data_type variable3;


   // behaviors -- methods

   access_level return_type method1(parameter_list) {
      // method body
   }

   access_level return_type method2(parameter_list) {
      // method body
   }

   access_level return_type method3(parameter_list) {
      // method body
   }

}
The only new part of this format to us is the class declaration line (access_level class class_name). This is where we name our class (our custom data type) and define its innards within a code block.
We will discuss the access_level towards the end of this lesson. The main thing to note is the keyword, class, which tells C-sharp that we are defining a custom class with the class_name we decide to give it.
A Class can be named anything as long as it starts with a letter and is not a pre-existing C-sharp keyword. The C-sharp convention is to use camel-casing for class names (e.g. BomberPlane, HarrierJet).
Let’s assume we’re creating some sort of ninja fighting game. We may want a custom data type to represent a ninja character type since we are likely to have several. We could declare a class to represent a ninja object. In your Fundamentals.cs script file, locate the space between the library import statements (the last line should be Using UnityEngine;) and the script top-level class which starts with this line:
public class Fundamentals: Monobehaviour { ...
Add the following code in that space.
public class Ninja {

}
We now have a valid class that we could use to create instances of Ninjas. Right now it’s empty so lets make it a bit more useful. I imagine there are some attributes of ninjas we may need in a game such as power level, health level, weapon, running speed and suit color. Lets add these attributes.
public class Ninja {
    int power = 10;
    int health = 5;
    float speed = 3.5;
    string weapon = “katana”;
    string suitColor = “red”;

}
Now that we have some basic attributes for our Ninja type, let’s give our Ninja class a couple of behaviors. I’d like our ninja object to be able to change weapons, change suit color and yell when instructed. Lets add those methods next.
public class Ninja {int power = 10;int health = 5;float speed = 3.5;string weapon = "katana";string suitColor = "red";public changeWeapon(string nextWeapon) {weapon = nextWeapon;}public changeSuit(string nextColor) {suitColor = nextColor;}public yell() {Debug.Log("Hee-yah!");}}
Your entire script file, if you’ve been following along, should look something like this:
using System.Collections;using System.Collections.Generic;using UnityEngine;public class Ninja{private int power = 10;private int health = 5;private float speed = 3.5;private string weapon = "katana";private string suitColor = "red";public void changeWeapon(string nextWeapon) {weapon = nextWeapon;}public void changeSuit(string nextColor) {suitColor = nextColor;}public void Yell() {Debug.Log($"Yee-haw! I am a {suitColor} ninja with a giant {weapon}!");}}public class Fundamentals : MonoBehaviour{// Start is called before the first frame updatevoid Start(){Debug.Log("Unity Rocks!");}// Update is called once per framevoid Update(){}}
We have now defined a class that we can use to create as many new Ninja objects as we want, anytime we want. Let's learn how to do that next.
Using a class
Once we’ve defined our class (the blueprint), we can use that class to create instances (objects) of our custom defined data type. The process of creating a new instance from a class definition is called instantiation. The way to instantiate new objects will be familiar to you--we simply use the new keyword when creating our variable much like we did when creating a new list object.
Let's create our first Ninja object. In the Start() method, add the following code:
Ninja ninja1 = new Ninja();
With our new instance let's ask it to Yell();
ninja1.Yell();
The console should now print out:
“Yee-haw! I am a red ninja with a giant katana!”
Lets create a second ninja.
Ninja ninja2 = new Ninja();ninja2.Yell();
Right now, our second ninja prints out the same exact thing as the first one.
“Yee-haw! I am a red ninja with a giant katana!”
Let’s change this.
ninja2.changeWeapon("bo");ninja2.changeSuit("purple");ninja2.Yell();ninja1.Yell();
Now, ninja2 prints
“Yee-haw! I am a purple ninja with a giant bo!”
While ninja1 prints
“Yee-haw! I am a red ninja with a giant katana!”
We could keep creating new instances of our Ninja class this way indefinitely. However, every time we create a new instance, the attributes like suit color or weapon are always the same at the beginning. What if we would like to create new instances but specify the suit color and weapon during instantiation? Well, we can do that using a special type of method in our class called a constructor.
Constructor methods are just regular class methods that are executed when the instance is created. Constructor methods must be named exactly the same as the class name and do not have a return type—they must be void.
For our example, we would like to provide a way to specify the suit color and weapon for each new ninja. This can be accomplished by adding two parameters on our Ninja constructor method. Let’s modify the Ninja class to look like this:
public class Ninja{private int power = 10;private int health = 5;private float speed = 3.5;private string weapon = "katana";private string suitColor = "red";public Ninja(string weapon, string suitColor) {this.weapon = weapon;this.suitColor = suitColor;}public void changeWeapon(string nextWeapon) {weapon = nextWeapon;}public void changeSuit(string nextColor) {suitColor = nextColor;}public void Yell() {Debug.Log("Yee-haw! I am a {suitColor} ninja with a giant {weapon}!");}}
We now have a constructor function which accepts two string variables--one for the weapon and one for the suit color. The constructor assigns these values to the object's weapon and suitColor variables respectively. The “this” keyword is C-sharp’s way of referencing the current object (self-referencing). This is how the compiler tells the difference between the weapon variable you’re passing as a parameter and the weapon variable that is an attribute of our ninja object.
Now, our instantiation call could look like this:
Ninja ninja1 = new Ninja("nunchuk", "blue");
It's important to note that this is now the only way we can instantiate a new Ninja object. The old method without parameters will no longer work. If we still wanted a way to instantiate ninja objects without specifying weapon or suit color, we would need to add a second constructor which doesn’t accept parameters like this:
Public Ninja() {Debug.Log(“Ninja created with default values”);}
Lets add this to our file right before the existing constructor so our class looks like this:
public class Ninja{private int power = 10;private int health = 5;private float speed = 3.5;private string weapon = "katana";private string suitColor = "red";public Ninja() {Debug.Log("Ninja created with default values");}public Ninja(string weapon, string suitColor) {this.weapon = weapon;this.suitColor = suitColor;}public void changeWeapon(string nextWeapon) {weapon = nextWeapon;}public void changeSuit(string nextColor) {suitColor = nextColor;}public void Yell() {Debug.Log($"Yee-haw! I am a {suitColor} ninja with a giant {weapon}!");}}
Now we can create our ninja objects like this:
// creates a ninja with default attributes

Ninja ninja1 = new Ninja();
// creates another ninja with these values Ninja ninja2 = new Ninja("crossbow", "green");ninja1.Yell(); // Yee-haw! I am a red ninja with a giant katana!ninja2.Yell(); // Yee-haw! I am a green ninja with a giant // crossbow!
Other details about classes (access and scope)
Now that we understand how to use classes, let's finally talk about those access_level keywords we keep running into. Access level keywords, or access modifiers as they are called, determine how “visible” a particular variable, method or class is to other objects in your program. Every C-sharp program runs within what’s called a program assembly (a bundle of all the classes and libraries compiled together as part of your program’s executable).
The main visibility levels are:
Public -- these methods and variables can be accessed by any code with access to the object whether in the same assembly or not.
Protected -- these methods and variables can only be accessed by code in the same class or subclass (subclasses are classes derived from a parent class--no need to worry about them for now until we learn about inheritance).
Private -- these methods and variables can only be accessed by code in the same class.
Internal -- these methods and variables can only be accessed by code in the same assembly.
If you skip declaring an access level, then a default visibility is used--class variables and methods default to private while classes default to internal.
Access levels are best illustrated with an example. We’ll largely be concerned with just the public and private access levels. So, let's revisit our Ninja class example in our script.
Right now the Fundamentals script is running in a class of its own as you can surmise from the code. The Fundamentals script and the Ninja objects created within it are logically separate objects.
In the Start() function of the Fundamentals script, we instantiated a ninja object and then called its .Yell() method. We were able to do this because the .Yell() method was created with a public access level. If we had created the function with a private access level, the call would have failed.
The same logic applies to the variables in our Ninja class. Go to your Ninja class code and change the power level attribute to public for now.
public int power = 10;
Now in the Start() function of Fundamentals.cs try the following:
Ninja ninja1 = new Ninja();ninja1.power = 20; // since power is public, this worksDebug.Log(ninja1.power); // ...and so does this// However, if you try this, it will fail:// this fails because suitColor is set to private ninja1.suitColor = "black";
Private attributes can only be accessed by code within the class.
This sort of access level restriction is beneficial for code design, data security, proper encapsulation and separation of concerns within a program’s design. These benefits will become clearer the more you code and the larger your projects become.
The last thing worth mentioning here is variable scope. This refers to which variables can be accessed from different blocks of your code. This is different from access level modifiers which are enforced at runtime. Variable scopes are enforced at write-time, or compile time.
Let's revisit the Ninja class. I’ll add some new comments, a new private variable (BoxOfTricks) and a new method (ShowTricks).
public class Ninja{// Scope: All variables declared within this class block // have class scope and can be accessed by all code in // this classprivate int power = 10;private int health = 5;private float speed = 3.5;private string weapon = "katana";private string suitColor = "red";private List<string> BoxOfTricks = new List<string>() {"Cyclone Kick","Shuriken Flurry","Invisibility Cloak"};public Ninja() {Debug.Log(“Ninja created with default values”);}public Ninja(string weapon, string suitColor) {this.weapon = weapon;this.suitColor = suitColor;}public void changeWeapon(string nextWeapon) {// Scope: the nextWeapon parameter is passed into // this method and has method level scope only. // So, it does not exist outside this method. The // same applies for any variables declared within // a method.// As you can see, the weapon variable can be // accessed here because it has a class level scopeweapon = nextWeapon;}public void changeSuit(string nextColor) {suitColor = nextColor;}public void Yell() {Debug.Log($"Yee-haw! I am a {suitColor} ninja with a giant {weapon}!");}public void ShowTricks() {// Scope: BoxOfTricks is accessible because it was // declared at the class level but the i variable // is created in the for loop block, so it’s not // accessible outside this block. It has block // level scope only.for(int i = 0; i < BoxOfTricks.Count; i++) {Debug.Log($"Behold my {BoxOfTricks[i]}!");}// the i variable does not exist here}}
The rule of thumb with scope is that variables are accessible only within the code block they are declared within. These code blocks are usually at the:
Class level -- the variable can be accessed only within the class it is declared
Method level -- the variable can be accessed only within the method it is declared
Block level -- the variable can be accessed only within the code block it is declared, such as a looping block
That’s a wrap on the concept of classes. You’ll find yourself using classes extensively because they are a fundamental aspect of object-oriented design. When applied well they promote good code design and structure. So let’s get a little practice using classes.
Try it out
You’ve been tasked with creating a set of class structures to represent characters in your new game and the characters’ weapons. Here is your brief:
Create a class to represent a warrior.
Warrior attributes are
Name
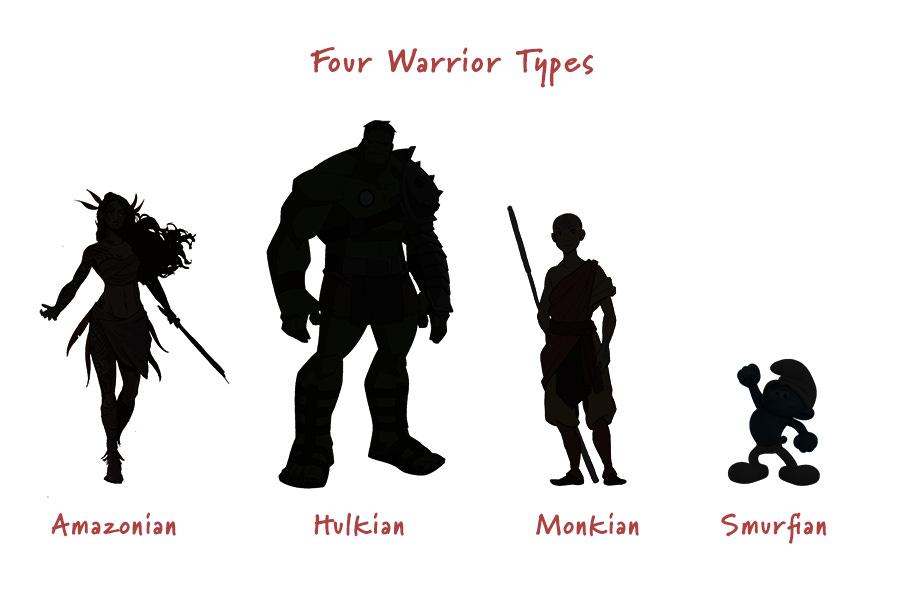
Warrior type (Amazonian, Hulkian, Monkian or Smurfian)
Health (0 to 100)
Power (0 to 10)
Sigil color
Weapon (created from the Weapon class)
Goodie bag
Warrior behaviors are
Greeting -- Print a hello message with their name
Strike -- Print the damage amount they can inflict which is:
weapon’s damage amount * warrior’s powerTake Hit -- decrease the Health score by the damage amount passed to this method
Inventory -- Print what’s in their Goodie Bag
Empty Bag -- ability to empty the bag at once (clear it)
Select Item -- ability to pick an item from the bag using the name of the item
Stash Item -- ability to place items into the bag by name only
Discard Item -- ability to remove and discard an item from the bag
Create a class to represent a weapon (which can be owned by the characters).
Weapon attributes are
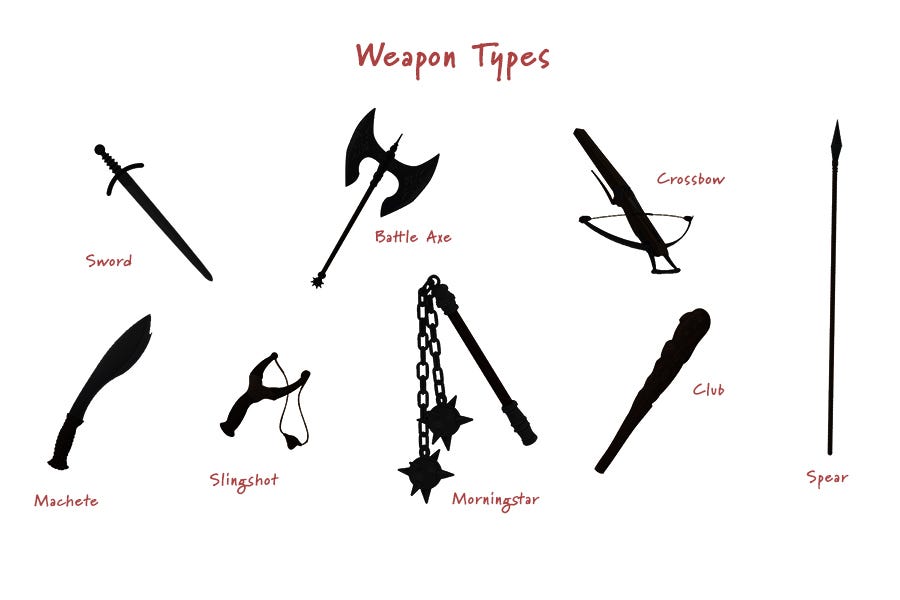
Weapon type (sword, battle axe, crossbow, spear, machete, slingshot, morningstar, club)
Damage amount (1 to 5)
Weapon ID
Create instances of the different warrior types and assign them different types of weapons.
Have fun with this exercise and see if you can get the striking and “take a hit” functions to work correctly between combatting warriors.


